As a gamer everyone wants the fastest internet connection and very low ping drop rate. sometimes, our local internet connection is not capable for long level latency and that’s why pings could be dropped. ping dropping causes very lags in-game which is really very frustrating. fortunately, Play Station 4 has a network option to add proxy on devices so that consumers can play seamless gaming without network interference.
This tutorial will be on two parts:
- How to create proxy server from VPS
- How to Add Proxy in PS4
you can skip the first part if you already have proxies available. you can buy proxies online or you can have free proxies from google search but those proxies won’t be fast and accurate. sometimes the internet and public proxies are spreading viruses. its batter to have dedicated private proxies or self-created proxies.
Create Proxy Server For PS4
we need two things in order to create our own private and fully dedicated proxy.
- Ubuntu VPS (Here is the link of digital ocean which would be credit $100 for fresh sign up)
- Squid proxy installed and configured
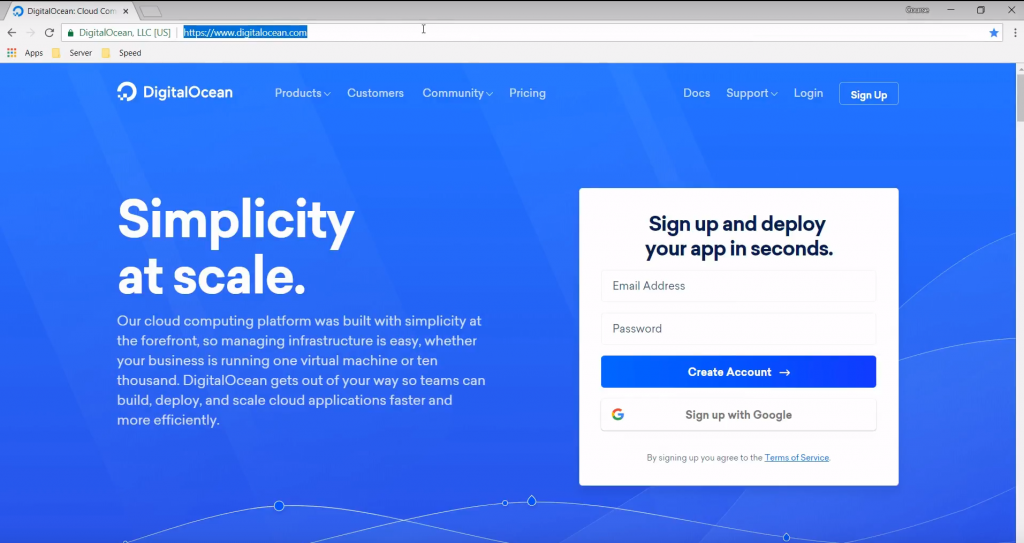
to create VPS is simple as creating the email account. sign up from the above link, verify your email address, verify payment details and you’re ready to go. once your account is created, you can simply click to order your brand new VPS.
Once you signed up, you’ll see a dashboard like the following image.
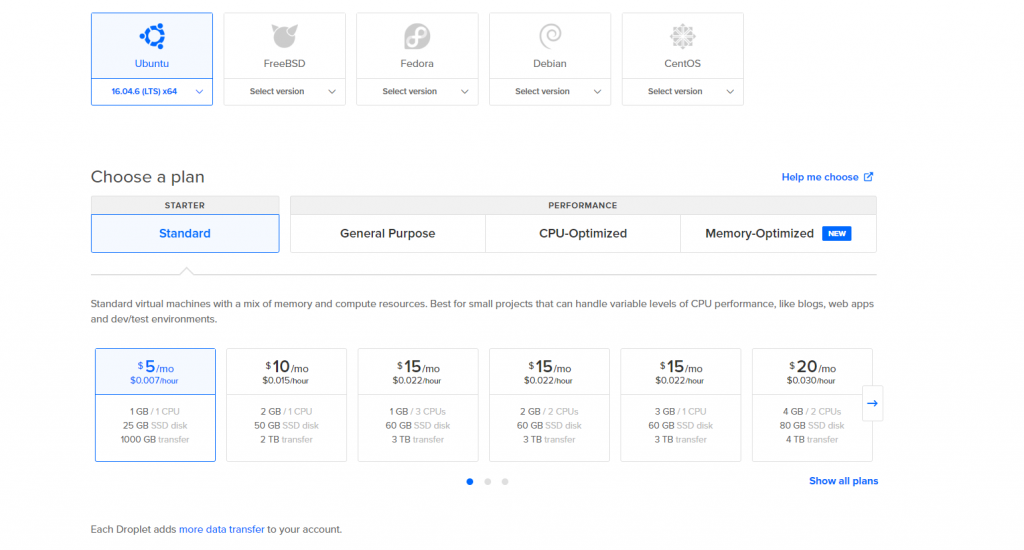
Select Ubuntu 16.04 64bit
Choose Standard Plan From starter
you can go with $5 / month as this server will be only used as a proxy so.
once the droplet is created, you’ll receive the IP address of the droplet and password in the registered email address.
Next step:
Download the putty client comfortable with your environment.
open putty software it will looks like the following image:
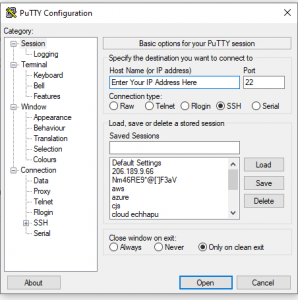
Enter your IP address in the box where i mentioned “enter your ip”
now click on ‘Open’
accept the certificate notification.
Now by default username would be ‘root’ without any caps in digital-ocean. if you’re using aws or any other well known vps then check their by-default usernames.
a password will the password that’s gotta in email address. (you won’t see any pasting while putting password. just right click one time after copying).
once you logged in, run the following command.
sudo apt-get updatesudo apt-get install squid
once squid has been installed, we need to edit the config file. follow the below command.
sudo nano /etc/squid/squid.conf
Navigate to find the http_port option. Typically, this is set to listen on Port 3218. This port usually carries TCP traffic.
If your system is configured for traffic on another port, change it here.
navigate to the http_access deny all option. This is currently configured to block all HTTP traffic. This means no web traffic is allowed.
Change this to the following:
http_access allow all
Now all it set, run the final command to restart the squid proxy.
service squid3 restart
if it does not work then run the following command.
service squid restart
now your proxy is ready to use it on PlayStation.
proxy IP will be the IP address of your server and port will be 3218 or your custom port if you’ve set it.
Note: if you don’t want to do this on your end, you can always hire freelancers from fiverr.com or private proxies from internet.
How to set Proxy settings on PS4
here we have created GIF for batter understanding of this full-length tutorial.
Follow the steps carefully and see our gif if you found any difficulites.
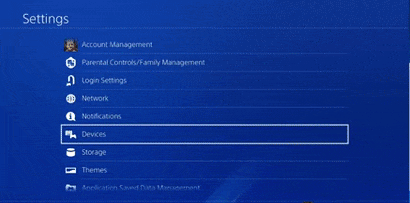
- select setting on the console menu
- click on network section
- select wifi or lan cable (your default connection)
- then easy > do not specify > automatic > automatic
- you’ll see proxy option select “use”
- enter your proxy (ip and port which you’ve created)
we can say proxy must help in the terms of good latency and download speed in some areas. however, if the internet connection is slow by-default then there is no way to fast your gaming experience. still if anyone wants to know about super fast google DNS for ps4 then they can check our article. if you guys facing any difficulties, you can always write comment down below. we will look forward to concern you. i hope you’ll get to set proxy for ps4 without any issues.
Leave a Reply
You must be logged in to post a comment.